The device comes with a 6.3-inch screen and 1080 x 2340 pixel resolution. Under the hood, you get an octa-core Mediatek MT6771 Helio P70 with Mali-G72 MP3 as the GPU. It comes in three different variants: 32GB 3GB RAM, 64GB 3GB RAM, 64GB 4GB RAM with the option to further expand the storage via SD Card. Then there is a dual rear camera setup with 13+2MP which could record videos at [email protected] Along the same lines, the single 25MP front-facing the camera again has the same [email protected] video recording capabilities. Coming with a rear-mounted fingerprint scanner, it has a 3500 mAh battery, which should take you through the entire day. All in all, it is definitely a decent offering from Realme, especially considering the price segment to which it belongs. But this is just the beginning. You could get a whole lot more from your device once you set your feet in the custom development scenario. Once you have unlocked the device’s bootloader, you could then easily flash a custom ROM, and even install Magisk to gain administrative rights. The last one is more commonly known as rooting your device. Once you do so, you could then gain access to the system partition, try out tons of mods, Magisk Modules, Substratum Themes, Xposed Frameworks among others. So with such a long list of benefits attached, no doubt users are looking for ways to root their device. And in this guide, we will help you achieve just that. Without any further ado, here are the steps to root your Realme U1 device without using TWRP Recovery.
How to Install OTA Updates in Rooted Android DeviceHow to Permanently Install TWRP without TWRP ZIP File (only using TWRP.img file)Root Android Devices Without TWRP RecoveryHow to Fix TWRP Error 7 (While Flashing Custom ROM via TWRP)
Rooting Realme Devices: What’s the Major Hurdle?
There exist two different methods to root any Android device. The first one simply involves flashing the Magisk Installer ZIP via TWRP. However, not every device has a working custom recovery like TWRP. In that case, the second alternative stands rooting the device without TWRP, using Magisk. All that is needed is a stock boot.img file for your firmware which could then be patched via Magisk and flashed via Fastboot commands.
However, with Realme, things begin to get a little bit difficult in this. The thing is all the Realme stock firmware comes in OZIP extension. Hence you cannot extract the firmware contents ‘the normal way’. You will have to make use of Python and a Decrypt tool to extract this firmware and get the boot image file. Trust us all these sounds difficult only on paper but in practice, it is way too much easier to execute. And in this guide, we will be making use of just that. On that note, here are the complete instructions to root the RealmeU1 device via Magisk without TWRP Recovery. here is the blueprint of this guide- we will first use Python and Decrypt tool to convert OZIP stock firmware to the ZIP package. Then we will extract that ZIP package via WinZIP or WinRAR. After this, the extracted stock boot.img file will be patched via Magisk. Finally, the magisk patched image fill be flashed via Fastboot on your Realme device. Follow ahead for the complete instructions.
Install Custom ROMs on any Android Device- Includes A/B PartitionFlash Custom ROM After Wiping Internal Storage Without SD Card or OTGHow to Go Back to Stock ROM from GSI ROM (All Android Devices)How to Flash Xiaomi Fastboot ROM without Mi Flash Tool
How to Root Realme U1
To begin with, there are a few requirements that your device needs to qualify. Make sure to go through them before you proceed with the rooting steps. Droidwin or any of its members won’t be held responsible if anything happens to your device. Proceed ahead at your own risk.
Prerequisites
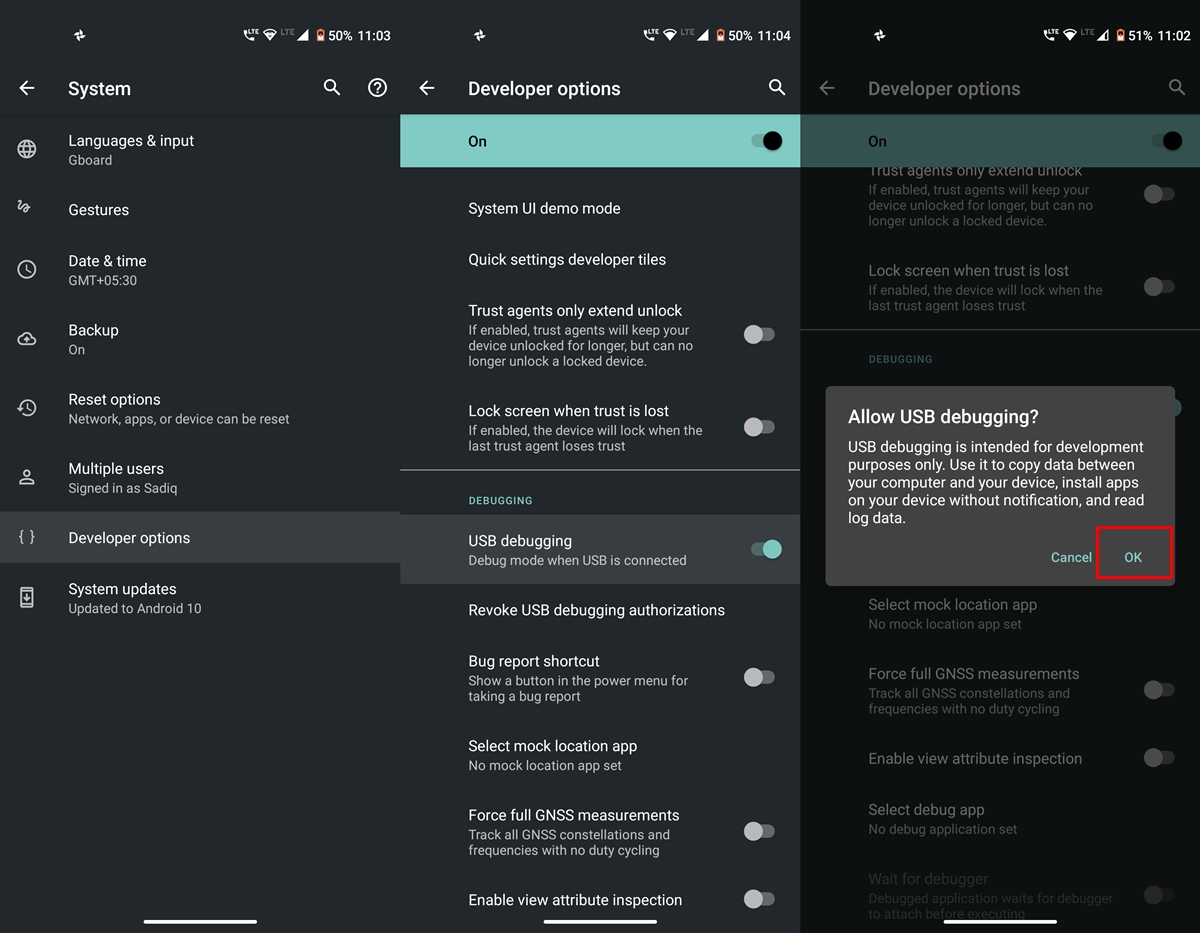
Download and install the Android SDK Platform Tools on your PC. This will give us the necessary ADB and fastboot binaries.Next up, enable USB Debugging on your Realme device. It will help your PC in recognizing your device in ADB mode. We would be needing to access ADB mode to reboot your device to Fastboot Mode. To enable Debugging, head over to Settings > About Phone > Tap on Build Number 7 times > Go back to Settings > System > Advanced > Developer Options > Enable USB Debugging.USB Debugging on AndroidFinally, download and install the Magisk Manager APK file onto your Realme device.
You may now proceed with the steps to root Realme U1 via Magisk, without TWRP Recovery. Follow along.
[GUIDE] Flash ROMs/Magisk/TWRP/Kernels on A/B Partition DevicesEverything About Magisk- Manager, Modules, and MoreBest Magisk Modules of 2020 [PART-1][3 METHODS] Unroot any Android Device-Uninstall Magisk
STEP 1: Unlock Bootloader
To begin with, you will have to unlock the device’s bootloader. If you haven’t done so, refer to our detailed guide on How to Unlock Bootloader on Realme U1. For that, we would be making use of the Realme U1 In-Depth Test Tool APK and one ADB and one Fastboot command. All the instructions are given in the linked guide. Do keep in mind that this process will wipe off all the data from your device and might also make the warranty null and void. Proceed ahead with caution.
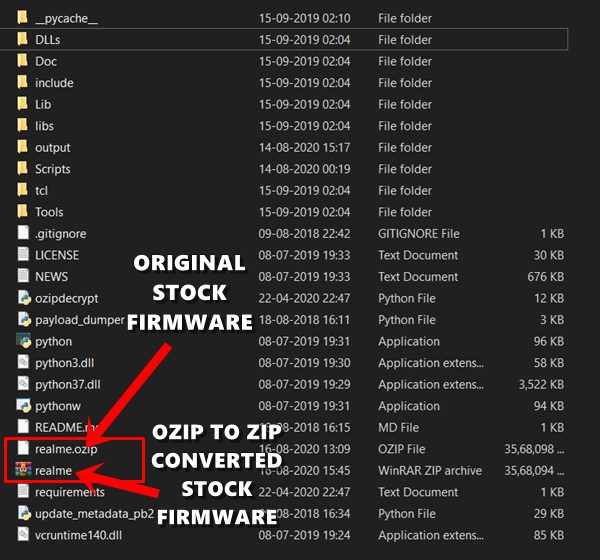
STEP 2: Convert Realme U1 Firmware from OZIP to ZIP
You now have to covert the Convert Realme U1 Firmware from OZIP to ZIP. We need to do this because then only we could extract the boot image file from ZIP. Extracting an OZIP file is just not possible using WinZIP or WinRAR. For that, a specific set of tools and instructions are needed. So head over to our comprehensive tutorial on How to Extract OZIP Realme Stock ROM (Firmware).
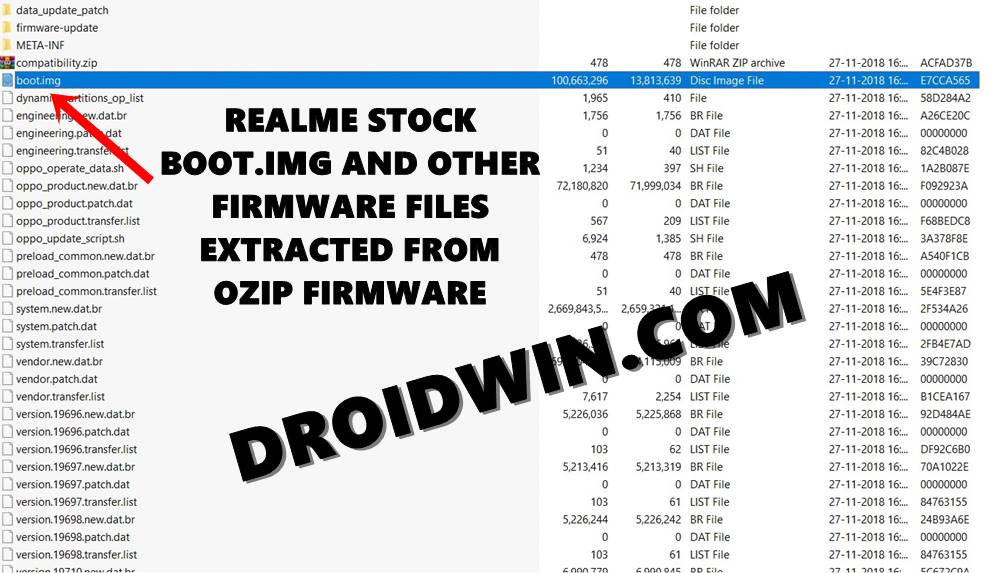
STEP 3: Extract Stock Boot Image File
Once you have converted your device’s stock firmware from OZIP to ZIP, make use of the WinZIP or WinRAR tool to extract the stock boot.img file. No need to extract all the contents of stock firmware. Just the boot.img file will do. Once you have extracted the file, move to your device’s Internal Storage.
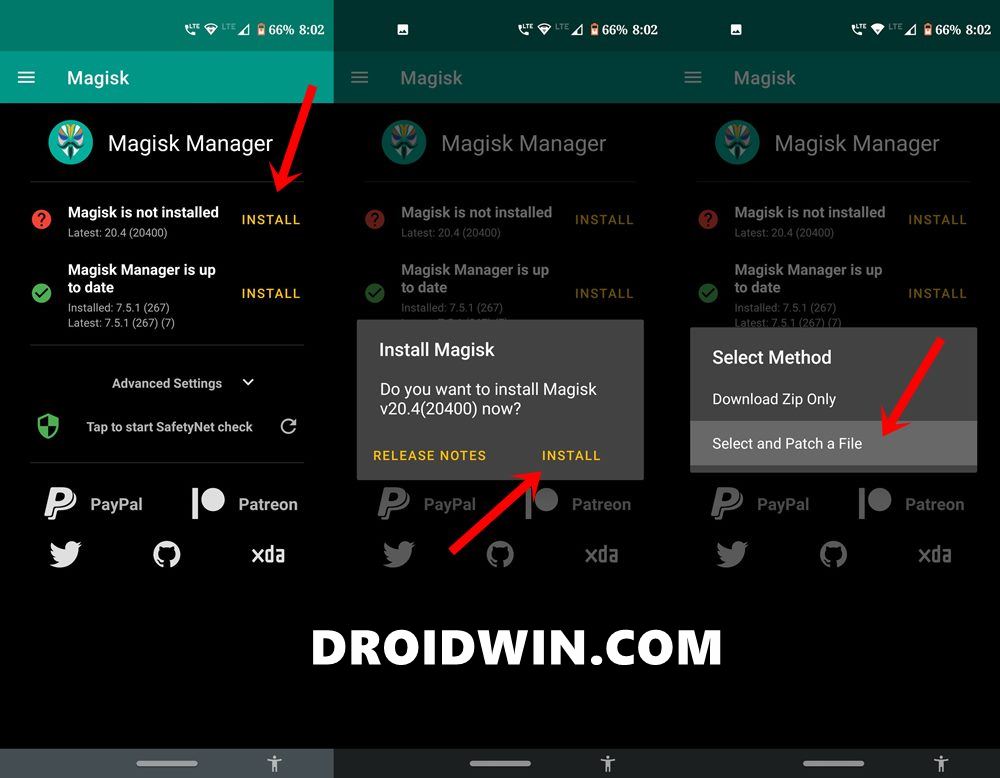
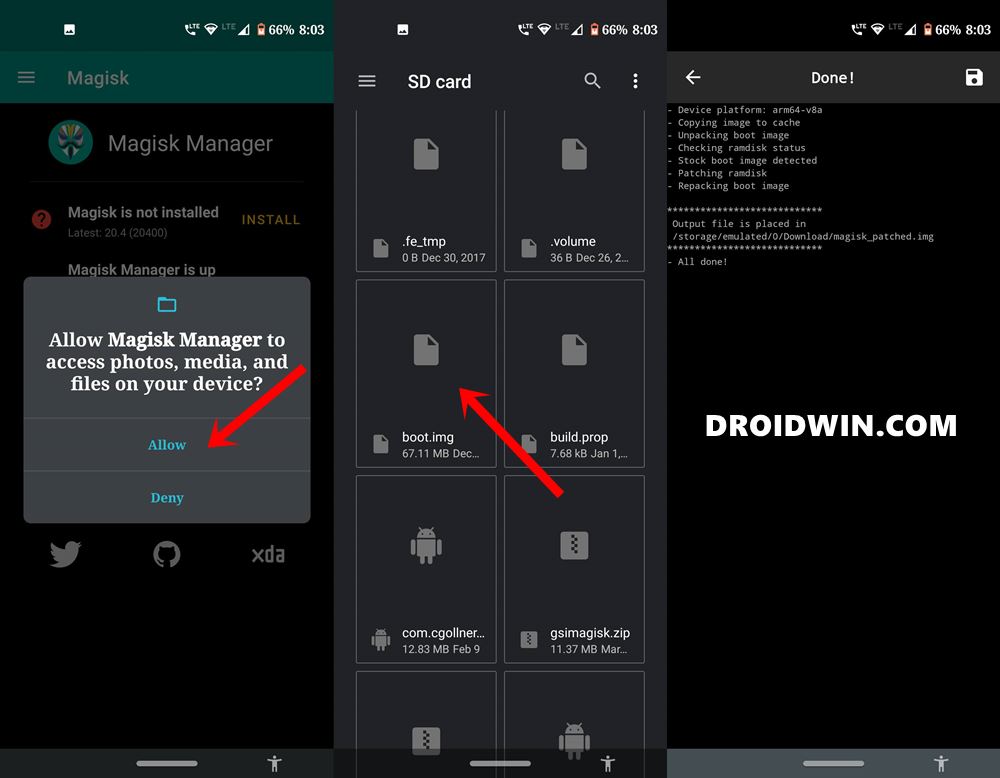
STEP 4: Patch Stock Boot Image via Magisk
STEP 4 & STEP 5 outlines the steps to patch stock boot.img file via Magisk and then flash it via Fastboot Commands. For detailed instructions on this topic, refer to our guide on how to Patch Stock Boot Image via Magisk and Flash it using Fastboot.
[GUIDE] Flash ROMs/Magisk/TWRP/Kernels on A/B Partition DevicesHow to Flash Various Files in A/B Partition DevicesInstall Custom ROMs on any Android Device- Includes A/B PartitionHow to Fix FAILED (remote: unknown command) Error
STEP 5: Flash Magisk Patched Boot Image onto Realme U1
So this was all from this guide on how to root the Realme U1 device via Magisk, without making use of the TWRP Recovery. If you any doubts, do let us know in the comments section below. Furthermore, now that the Android 11 stable build is live, here are some guides that might be of some interest to you:
Download GApps (Google Apps) for Android 11How to Install Android 11 on Asus Zenfone Max Pro M1Install Android 11 Beta on GSI Supported Project Treble DevicesHow to Install Android 11 On Xiaomi Redmi Note 4
About Chief Editor